
This baby shower gift was for a cousin's wife who has had a difficult pregnancy, and has endured MONTHS of bedrest in a hospital room with one window that looks out on a brick wall. Since that doesn't leave a lot of decorate the nursery time, I made this.
Part of the idea is of connections and of using materials in the way they were intended, but with a big twist. A single puzzle piece usually communicates nothing. But together, in context, it has meaning.
Pictures and a tutorial after the jump.
1. I found a framed poster.
The frame is kind of rustic, which I thought my cousin would like.

2. I took out the poster, flipped it over, and
painted over the words on the back. It became
my perfectly-sized canvas.


3. I painted my design. I kept the above layout handy so I could get the proportions right, but it was still a bit nerve-racking because I had to have the sections wide enough for puzzle pieces to fit, but small enough so I could get the whole image on the "canvas."


4. Next, I made my sandwich, putting the painted picture and then the cardboard backing into the frame.


6. I used pliers to pull the staples half-way out of the wood. This keeps the cardboard in place. (I was just putting it back the way I found it, as I’d had to put staples out to get the thing apart in the first place.)

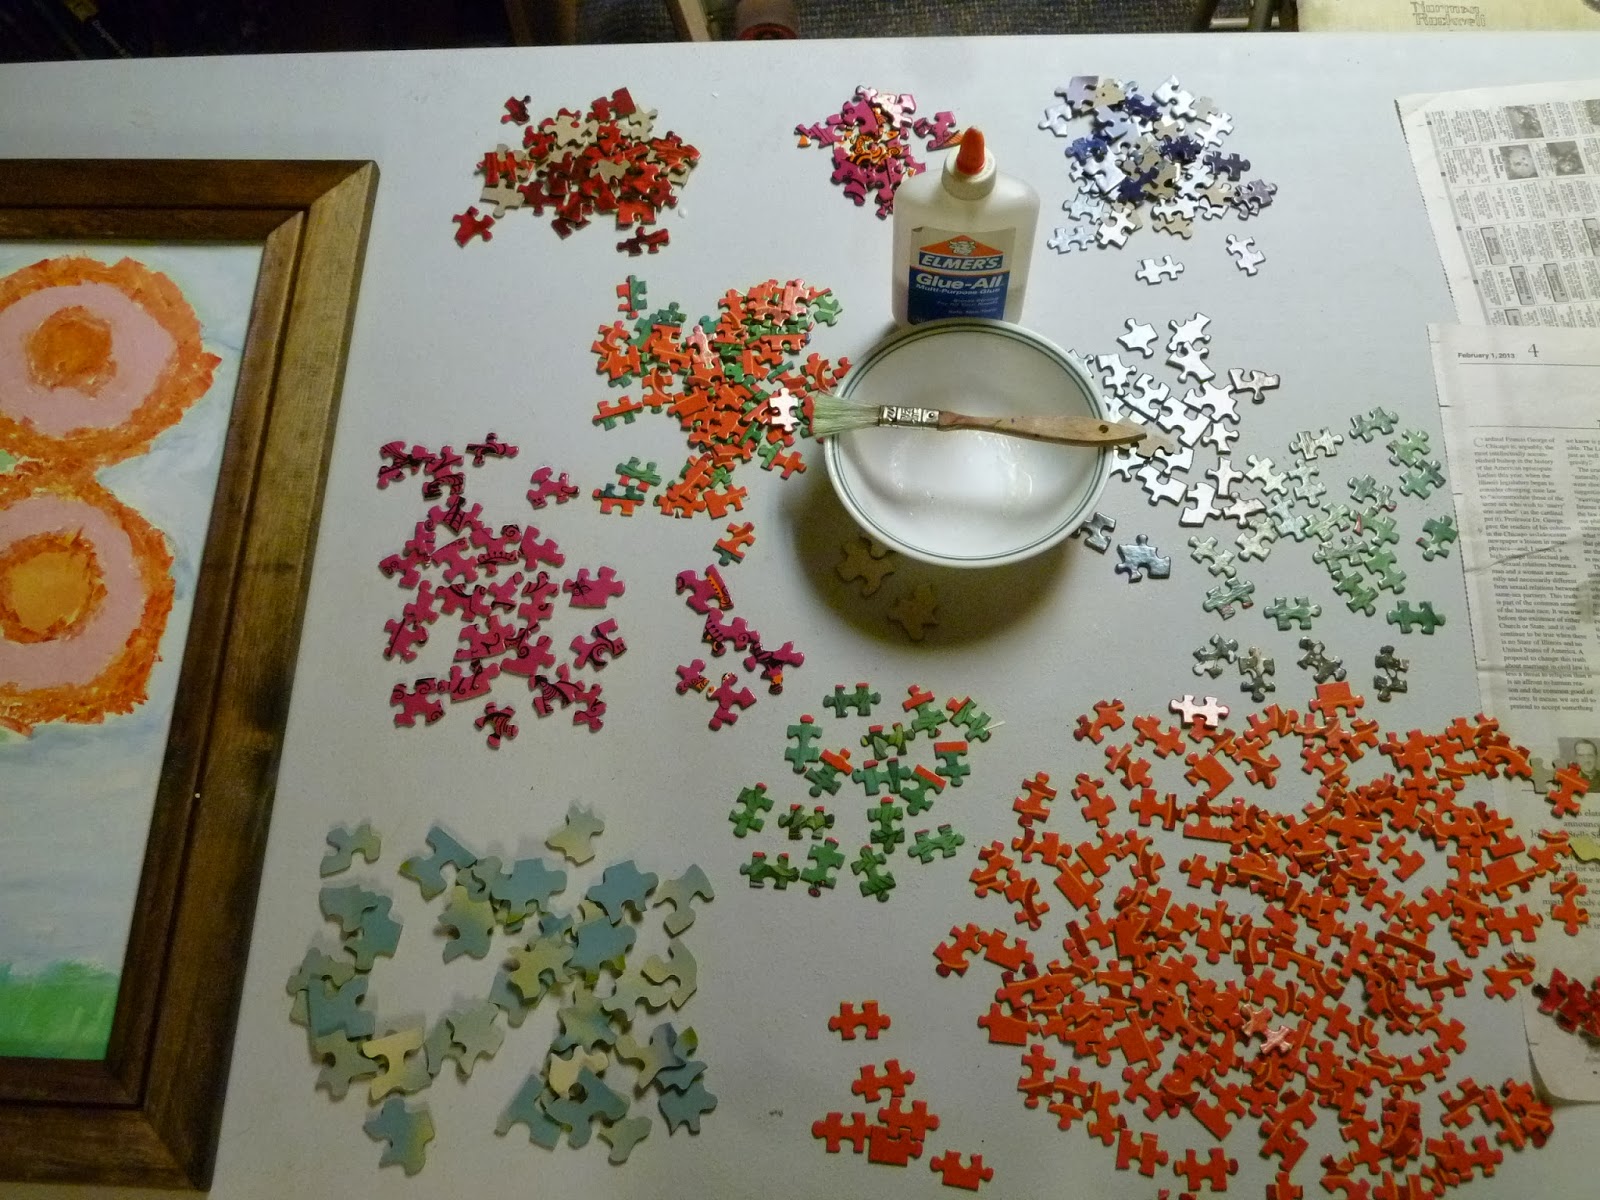
7. Working in small sections, I glued the pieces to the poster
with a mixture of PVA glue (Elmer’s) and water. This is a forgiving and
imprecise combination. Basically you
want it as thick as you can while still being able to apply it with a brush.
I also treated the puzzle pieces differently to emphasize the different areas, mostly by having the sky pieces be almost the only ones that weren’t touching. I didn’t really have enough puzzle pieces, but I was out of Thrift Store puzzles!

Here is the finished piece:


I hope the little baby girl likes it! Now to get it wrapped....
No comments:
Post a Comment